 The Mysterious Affair at Styles by Agatha Christie
My rating: 4 of 5 stars
My first Agatha Christie’s book.. the plot is thick and suspense is kept until the very end of the book. Now on to my next one of Monsieur Hercule Poirot’s mystery.
View all my reviews
Wednesday, April 28, 2021
Book Review: The Mysterious Affair at Styles (Hercule Poirot #1) by Agatha Christie


Monday, October 19, 2020
Passed Certified Kubernetes Application Developer exam

You can take the test from home. We can use an external monitor with the laptop (which i did) and we need to share both the laptop and the monitor's screen with the proctor. We also need to share the camera so proctor can watch while we take the test. The initial setup with PCI (test taking company) is bit involved and may take 15-20 mins so plan accordingly. In my case i could not write the test first time where the web terminal was unable to connect to Linux Foundation's server. Proctor tried with me for almost 1.5hrs and finally needed to reschedule. The next attempt was smooth but still setting up for the exam does take about 15mins.
At the beginning of each question you are given a command to connect to the right cluster. There were 4 such clusters. For the questions i attempted, only 2 of the 4 clusters were used. Also the questions are grouped together by the cluster you need to connect to in order to minimize the changing between clusters. Also there are parts in the question that can be clicked on and copied and then pasted in the terminal. The terminal is a web terminal so you can see it side-by-side with the question on the same web page. You can have one more tab open for https://kubernetes.io/docs. So it is an open book exam but speed really matters so you need to know what to look in the docs and where to look in it.
Grading of the exam may take up to 36 hrs after which the result of pass/fail is known.
I will update the post once i have the result.
I failed my first attempt - scored 60% and pass score is 66%.
I attempted my re-take today 10/25/20 (Sunday) at 11am CST. This time i realized that each question has a weightage mentioned in percentage. Like some were 2% whereas some were 7%. I also flagged 3 questions to come back to later and moved on. So by the time i was on 19th question i had 32 mins left. I did get sufficient time this way to at least look at all questions. Of the 3 i had marked to return back to later, i only could attempt 1 of them. But they each were 2% weightage so most likely my score wont be impacted by much. Lets see how i fair this time. I will update again tomorrow evening once i receive my result.
An easy to install local single node k8s cluster is microk8s from Ubuntu. I had used this and OLCNE clusters for my practice but microk8s is the easiest option.
Received result for my CKAD exam - i scored not too high (67% only) but still could clear the exam successfully. I plan to write CKA sometime down the line. I think to clear this exam one needs to be quick with typing linux commands. I think 80% or above is a very good score for this exam. But anyway now that i am past it i will rather focus on learning more at this point. Waiting for the Marko Luska's Kubernetes in Action 2nd Edition book to be published and in the meanwhile will be ramping up on other Cloud Native stuff - like service mesh, functions, API gateway, streaming services and monitoring stacks (ELK, Prometheus, Grafana) etc.
Following are the materials i used to prepare:
- https://github.com/bmuschko/ckad-prep - to practice exercises with the below video course.
- https://learning.oreilly.com/learning-paths/learning-path-certified/9781492061021 - Video course by Brian Muschko
- https://kubernetes.io/docs/ - Must practice finding the yaml definitions by searching the docs for various tasks - like creating deployments, services, network policies, etc.
- https://courses.edx.org/courses/course-v1:LinuxFoundationX+LFS158x+2T2019/course/ (Free) - This is required before you do the paid course from CNCF for CKAD.
- Book: Kubernetes Up and Running 2nd Edition by Burns, Beda and Hightower - A more up-to-date book that covers all commands and a quick read compared to the next book.
- Book: Kubernetes in Action by Marko Luska - This is a large book but very readable and said to be one of the best to understand the concepts behind the components of kubernetes.
- CNCF CKAD Training course (Paid) - https://www.cncf.io/certification/training/
- Exercises: https://github.com/dgkanatsios/CKAD-exercises - Must do set of exercises.
- CKAD Prep Notes: https://github.com/twajr/ckad-prep-notes
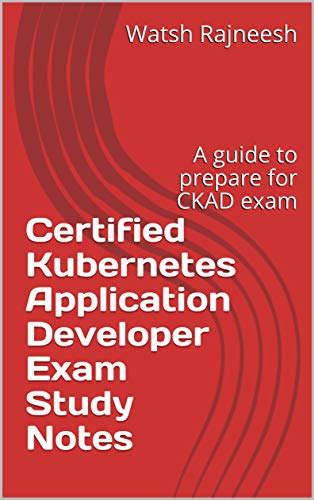
My study notes on CKAD exam prep is available at https://www.amazon.com/dp/B08MXGDT3L
Monday, July 27, 2020
 The Cuckoo's Calling by Robert Galbraith
My rating: 5 of 5 stars
A great mystery series by the one and only J K Rowling or Robert Galbraith. This is the first book in the series of Cormoran Strike and his good assistant Ms Robin Ellacott. Robin has just moved to London city from country side and has joined temporary placements agency which places her to be assistant to one Mr Strike who is a private eye. Robin brings good luck to Strike as one her very first day there comes a client Mr John Bristow who wanted Strike's help in investigating the death of his sister Lula Landry, who was a supermodel and whose death was considered a suicide thus far. From there on Strike interviews all possible folks who came in contact with Lula in her daily life and finally he and Robin solve the mystery and find the killer. A nice whodunnit book by one of my favorite authors.
View all my reviews
Wednesday, June 17, 2020
Book Review: The Body: A Guide for Occupants by Bill Bryson
 The Body: A Guide for Occupants by Bill Bryson
My rating: 5 of 5 stars
This was my first book by Bill Bryson. He is an excellent author - the book is easy to read and thoroughly researched. In this book author makes the subject of human body accessible to laymen. My interest in this book was to get a refresher of things i had read in biology classes in school days and topics that one hears being mentioned by health related books/articles - ranging from understanding of how the different organs, glands and parts of the body function, the different kinds of diseases, their symptoms and how they are acquired, our body's built-in defense mechanism (the immune system, white blood cells and the different glands that fight-off the harmful microbes entering our body - like the placenta that shields the womb/baby from the harmful microbes), aging and eventually death and the state of the body after one dies. It also mentions of the evolution of medical science to some extent and calls out the people who contributed to the field - sometimes at the cost of their own lives. A very interesting read.
View all my reviews
Tuesday, June 02, 2020
Book Review: The Picture of Dorian Gray by Oscar Wilde
 The Picture of Dorian Gray by Oscar Wilde
My rating: 4 of 5 stars
I had been meaning to read this book for a long time and finally could get this checked off the list of to-be read books. The impression i had of this book was that it will be a quick read but as is the case with every book that is heavy on literature, it tends to be a dense read -as most of the book is loaded with phrases and full of sentences that can be underlined and quoted. The story is short - a guy named Dorian Gray is blessed with good looks and full of youth. Dorian sits for a painter Basil Hallward, who worships Dorian and considers Dorian to have a very positive influence on his art - one that any artist can only find by chance in their life time. Then there is Lord Henry Wotton who is a friend of Basil and Dorian. Dorian learns from Lord Henry the importance of youth and comes to see his own portrait painted by Basil full of life. Basil gives that painting to Dorian to keep. Dorian likes that painting so much that he wishes if only he could never loose his youth and his painting becomes old with time instead. This wish of his comes true. As time passes Dorian retains that charm of his youth, the same boyish look he had when he sat for that painting. The painting instead starts to appear old. As Dorian gets drawn towards vices in his life he is still able to retain his youth but his painting started to show the evil look. Dorian hides the painting from everyone. He commits several sinful acts and evens kills the painter who drew the picture. At the end he decides to kills the Dorian in the painting and that puts an end to his life.
It is not a light reading as i had thought initially so read it if you enjoy reading good literature (prose or poetry).
View all my reviews
Sunday, May 24, 2020
Book Review: The Eye of the Needle by Ken Follet
 Eye of the Needle by Ken Follett
My rating: 5 of 5 stars
A german spy Die Nadel (or The Needle) has been in London during World War II. He is assigned the task to gauge the military at Port Calais in France. Allied forces have been planning a camouflage setup at Calais to dupe the Germans into thinking the attack is going to happen from Calais instead of from Normandy. To that effect, many artists and movie studio setup workers were put to building a massive fake military setup in Calais. Die Nadel or Henreich Faber happens to find out that its a fake and not a real military setup and from that point on the book is about whether he is able to deliver the proof of his findings to Abwehr in time or not. The story is fast paced and keeps the reader engaged. A good novel to start reading the works of Ken Follet.
View all my reviews
Friday, May 08, 2020
Book Review: The Death of Ivan Ilych by Leo Tolstoy
 The Death of Ivan Ilych by Leo Tolstoy
My rating: 5 of 5 stars
This is the first book of Leo Tolstoy i read. Its a small novel with 10 chapters and took me about 3hrs to complete in all. The story is about the life of a man named Ivan Ilych. It starts with folks from his work and his friends attending his funeral. The story then revolves around who he was and how he got injured on falling while he was infatuated with decorating his new house, his relationship with each member of his family, his reminiscences during his last days of his life when he reflects on his childhood and the happy memories of those days, what he feels about the doctors who don't seem to empathize with him and fail to answer his questions concerning his health in a direct manner. Tolstoy excels in describing the emotions of the characters and there are several occasions when the reader feels drawn by the realism of author's description of what the characters feel. Its a masterpiece of a work and i highly recommend it for the literary value of this book if not so much for the story in it.
View all my reviews
Tuesday, May 05, 2020
Passed Docker Certified Associate Exam
I have been procrastinating on this for a while but due to COVID-19 shelter-in-home and no classes to take kids to, got enough time to get this taken care of.
Now regarding the exam, while i was lingering on when to take this exam (had enrolled last year December) Docker got bought by Mirantis and the DCA exam which used to multiple choice only became a bit harder with majority of questions (42 of total 55) being DOMC (Discrete option multiple choice). Also the syllabus got revised (v1.1 of study guide) to include many Kubernetes topics in the exam. Lots of Kubernetes related questions were there from topics including persistent volumes, configMaps etc. Fortunately i am also preparing for CKAD (Certified Kubernetes Application Developer) and going to write it soon on 16th May, 2020 so i was able to answer those.

My study notes are available at https://www.amazon.com/dp/B08MY87SMK
My experience taking the test was - it took me about an hour to complete the exam so i think the 90mins duration is sufficient.
Monday, May 04, 2020
Setup a k8s cluster with OLCNE
To install a development setup for kubernetes an easy option is to use https://github.com/oracle/vagrant-boxes/tree/master/OLCNE.
All we need is virtualbox and vagrant installation, clone the above git repo and run vagrant up.
By default it creates a k8s cluster with 1 master and 2 worker nodes.
As of today it installs OEL 7.8 with k8s 1.17.4.
[vagrant@master1 ~]$ kubectl get no
NAME STATUS ROLES AGE VERSION
master1.vagrant.vm Ready master 3h35m v1.17.4+1.0.1.el7
worker1.vagrant.vm Ready 3h34m v1.17.4+1.0.1.el7
worker2.vagrant.vm Ready 3h34m v1.17.4+1.0.1.el7
[vagrant@master1 ~]$ cat /etc/oracle-release
Oracle Linux Server release 7.8
All we need is virtualbox and vagrant installation, clone the above git repo and run vagrant up.
By default it creates a k8s cluster with 1 master and 2 worker nodes.
As of today it installs OEL 7.8 with k8s 1.17.4.
[vagrant@master1 ~]$ kubectl get no
NAME STATUS ROLES AGE VERSION
master1.vagrant.vm Ready master 3h35m v1.17.4+1.0.1.el7
worker1.vagrant.vm Ready
worker2.vagrant.vm Ready
[vagrant@master1 ~]$ cat /etc/oracle-release
Oracle Linux Server release 7.8
Monday, April 27, 2020
Setting up VSCode for Go Programming
- Idea behind Golang is to minimize the number of lines of code.
- Primary use of Go is to write server-side programs or command line programs.
- Creators of Golang - Ken Thomson, Rob Pike and Robert Griesemer
- Modern standard library
- Compile to single native binary - no runtime required.
- Has garbage collection built in
- Simple, strongly-typed, procedural language with object oriented features - very few language features have been added since 1.0 release
- Built-in concurrency
- Fast to compile and run quickly
- Some popular Go projects:
- K8s
- Docker
- Prometheus
To setup an IDE for Go - Visual Studio Code is a good choice.
- Install VS Code from https://code.visualstudio.com/download
- Setup VS Code for Go development by installing the “Go” Extension from Microsoft
- Also install the Go packages by:
- Cntl + Shift+ P or View > Command Pallet
- Enter: Go: Install/Update Tools
- Select All and Click OK.
- Go to Settings for Go Extensions - Look up “Infer GoPath” setting and enable/check it.
Now you should be able to use the IDE to edit and compile/run go code.
Also watch this screencast https://www.youtube.com/watch?v=XCsL89YtqCs on writing, building, installing and testing Go code.
Set GOPATH environment variable to a directory where your go code will reside.
For example: ~/go directory.
export GOPATH=~/go
Under ~/go create 3 directories that go requires:
src, pkg and bin
At any point look for the go documentation as:
> go doc fmt.Println
Following is a hello world program that will go in ~/go/src directory.
package main
import "fmt"
func main() {
fmt.Println("Hello, World")
}
In VS Code launch the Terminal (Cntl + Shift + `) or Terminal > New Terminal.
To build the program:
> go build hello.go
> ./hello
To directly run the program and not build it first:
> go run hello.go
Tuesday, April 21, 2020
Creating a docker swarm cluster with virtualbox
On the host system:
1. Install virtualbox:
sudo apt install virtualbox
2. Install docker:
sudo apt install docker.io
Add user to docker group:
sudo groupadd docker
sudo usermod -aG docker $USER
Either manually create 3 VMs (1 manager and 2 workers) or use docker-machine.
Note: With Secure UEFI boot enabled in BIOS installation of virtualbox requires us to generate a MOD key protected by password. When installation completes we are required to reboot and then enroll the MOD key by entering the same passphrase for the key.
Approach 1 - Manually create 3 VMs (1 manager and 2 workers) - Recommended
Networking for the 3 VMs should meet the following requirements:
1. We should be able to ssh to each of the ubuntu VMs from host system.
2. We should be able to access internet from ubuntu VMs. This is required for the docker registry access.
3. Lastly, each VM should be able to reach the IP address of other nodes in the cluster.
If installing ubuntu VMs also install docker -- this can be selected during OS install .. but you will still need to add your user to docker group post installation.
To setup networking for the VMs:
1. Virtual Box > Host Network Manager > create an adapter (it will be named vboxnet0 by default) say with the following config:
DHCP - Enabled (though this is not best way but generally the IP allocated to a VM wont change and it saves the effort of manually configuring the static ips on each VM)
Refer - https://www.tecmint.com/network-between-guest-vm-and-host-virtualbox/
Configure Adapter Manually :
IPv4 address: 192.168.56.1 -- this becomes the gateway address
IPv4 Network Mask: 255.255.255.0
Leave the IPv6 settings to default
On DHCP tab:
Server Address: 192.168.56.100 -- the DHCP server
Server Mask: 255.255.255.0
Lower Address Bound: 192.168.56.101 -- first VM's ip address can begin with this.
Upper Address Bound: 192.168.56.254
2. Select each ubuntu VM > Settings > Network > create 2 Network Adapters.
Network Adapter 1 ->
Add the following entries to /etc/hosts (change to your preferred names) on the host system:
192.168.56.101 manager
192.168.56.102 worker1
192.168.56.103 worker2
Approach 2 - Use docker-machine
To create via docker-machine use the command though i prefer the above approach as it gives more flexibility to choose our preferred OS version to install instead of having to live with the version that comes with docker-machine. Also with docker machine approach you end up running one additional VM which runs docker. On a Linux host we dont need that as docker engine can run natively on the host system rather than requiring a separate docker host VM.
docker-machine create -d virtualbox default
The above command will create a VM with name "default" that will be used as host for running the docker engine and additionally will create 3 nodes for swarm cluster.
To Setup Swarm mode:
On Manager node:
$ docker swarm init --advertise-addr 192.168.56.101:2377 --listen-addr 192.168.56.101:237
where, 192.168.56.101 is this manager node's ip address.
We only have one manager which also is the leader. Docker swarm supports having more than one manager nodes but there can be only one leader among them at any given time. We run the swarm init command on the leader node and all other manager nodes will then join the swarm cluster using the manager token.
On 2 Workers:
Run swarm join command for worker nodes to join the swarm cluster.
$ docker swarm join --token SWMTKN-1-4azauf7ujxp711zzwb1ihfluqjy5om6pa4zlicmm7pq3l0svcp-d2bgy5mtsl0w82n99suvb1uu6 192.168.56.101:2377 --advertise-addr 192.168.56.102:2377 --listen-addr 192.168.56.102:2377
The above command will be given in o/p of swarm init.
To get the above commands again anytime following commands can be used on the manager node to get it:
docker swarm join-token manager
docker swarm join-token worker
Running docker info will show there is 1 manager and 3 nodes in swarm cluster and that swarm is active. It will also show if the current node is a manager or not.
To deploy a test app (an example from nigel poulton's course on pluralsight.com).
docker service create --name psight1 -p 8080:8080 --replicas 5 nigelpoulton/pluralsight-docker-ci
docker service ps psight1
The above command will show which node is each replica running on.
$ docker service ps psight1
ID NAME IMAGE NODE DESIRED STATE CURRENT STATE ERROR PORTS
jk55y1btc0mo psight1.1 nigelpoulton/pluralsight-docker-ci:latest worker2 Running Running 40 seconds ago
3tlq4zb5s78m psight1.2 nigelpoulton/pluralsight-docker-ci:latest worker1 Running Running 40 seconds ago
tonkv7bmjei5 psight1.3 nigelpoulton/pluralsight-docker-ci:latest worker2 Running Running 41 seconds ago
znoek7dwq6x5 psight1.4 nigelpoulton/pluralsight-docker-ci:latest manager Running Running 41 seconds ago
teg2amzw2f73 psight1.5 nigelpoulton/pluralsight-docker-ci:latest worker1 Running Running 40 seconds ago
That's it! Now we have a working swarm cluster that we can use to deploy apps on.
1. Install virtualbox:
sudo apt install virtualbox
2. Install docker:
sudo apt install docker.io
Add user to docker group:
sudo groupadd docker
sudo usermod -aG docker $USER
Either manually create 3 VMs (1 manager and 2 workers) or use docker-machine.
Note: With Secure UEFI boot enabled in BIOS installation of virtualbox requires us to generate a MOD key protected by password. When installation completes we are required to reboot and then enroll the MOD key by entering the same passphrase for the key.
Approach 1 - Manually create 3 VMs (1 manager and 2 workers) - Recommended
Networking for the 3 VMs should meet the following requirements:
1. We should be able to ssh to each of the ubuntu VMs from host system.
2. We should be able to access internet from ubuntu VMs. This is required for the docker registry access.
3. Lastly, each VM should be able to reach the IP address of other nodes in the cluster.
If installing ubuntu VMs also install docker -- this can be selected during OS install .. but you will still need to add your user to docker group post installation.
To setup networking for the VMs:
1. Virtual Box > Host Network Manager > create an adapter (it will be named vboxnet0 by default) say with the following config:
DHCP - Enabled (though this is not best way but generally the IP allocated to a VM wont change and it saves the effort of manually configuring the static ips on each VM)
Refer - https://www.tecmint.com/network-between-guest-vm-and-host-virtualbox/
Configure Adapter Manually :
IPv4 address: 192.168.56.1 -- this becomes the gateway address
IPv4 Network Mask: 255.255.255.0
Leave the IPv6 settings to default
On DHCP tab:
Server Address: 192.168.56.100 -- the DHCP server
Server Mask: 255.255.255.0
Lower Address Bound: 192.168.56.101 -- first VM's ip address can begin with this.
Upper Address Bound: 192.168.56.254
2. Select each ubuntu VM > Settings > Network > create 2 Network Adapters.
Network Adapter 1 ->
- Check the option: “Enable Network Adapter” to turn it on.
- In the field Attached to: select Host-only Adapter
- Then select the Name of the network: vboxnet0
- Check the option: “Enable Network Adapter” to activate it.
- In the field Attached to: select NAT
Add the following entries to /etc/hosts (change to your preferred names) on the host system:
192.168.56.101 manager
192.168.56.102 worker1
192.168.56.103 worker2
Also to enable ssh without password:
create ~/.ssh directory and a file under it called authorized_keys
mkdir -p ~/.ssh
echo "[public key]" >> ~/.ssh/authorized_keys
Now you can ssh to the VMs without having to type in the password. For e.g.:
ssh [user]@manager
Once on the VM, try doing nslookup www.google.com and verify the internet connection is working.
Also verify you are able to ping the other 2 node ips.
Approach 2 - Use docker-machine
To create via docker-machine use the command though i prefer the above approach as it gives more flexibility to choose our preferred OS version to install instead of having to live with the version that comes with docker-machine. Also with docker machine approach you end up running one additional VM which runs docker. On a Linux host we dont need that as docker engine can run natively on the host system rather than requiring a separate docker host VM.
docker-machine create -d virtualbox default
The above command will create a VM with name "default" that will be used as host for running the docker engine and additionally will create 3 nodes for swarm cluster.
To Setup Swarm mode:
On Manager node:
$ docker swarm init --advertise-addr 192.168.56.101:2377 --listen-addr 192.168.56.101:237
where, 192.168.56.101 is this manager node's ip address.
We only have one manager which also is the leader. Docker swarm supports having more than one manager nodes but there can be only one leader among them at any given time. We run the swarm init command on the leader node and all other manager nodes will then join the swarm cluster using the manager token.
On 2 Workers:
Run swarm join command for worker nodes to join the swarm cluster.
$ docker swarm join --token SWMTKN-1-4azauf7ujxp711zzwb1ihfluqjy5om6pa4zlicmm7pq3l0svcp-d2bgy5mtsl0w82n99suvb1uu6 192.168.56.101:2377 --advertise-addr 192.168.56.102:2377 --listen-addr 192.168.56.102:2377
The above command will be given in o/p of swarm init.
To get the above commands again anytime following commands can be used on the manager node to get it:
docker swarm join-token manager
docker swarm join-token worker
Running docker info will show there is 1 manager and 3 nodes in swarm cluster and that swarm is active. It will also show if the current node is a manager or not.
To deploy a test app (an example from nigel poulton's course on pluralsight.com).
docker service create --name psight1 -p 8080:8080 --replicas 5 nigelpoulton/pluralsight-docker-ci
docker service ps psight1
The above command will show which node is each replica running on.
$ docker service ps psight1
ID NAME IMAGE NODE DESIRED STATE CURRENT STATE ERROR PORTS
jk55y1btc0mo psight1.1 nigelpoulton/pluralsight-docker-ci:latest worker2 Running Running 40 seconds ago
3tlq4zb5s78m psight1.2 nigelpoulton/pluralsight-docker-ci:latest worker1 Running Running 40 seconds ago
tonkv7bmjei5 psight1.3 nigelpoulton/pluralsight-docker-ci:latest worker2 Running Running 41 seconds ago
znoek7dwq6x5 psight1.4 nigelpoulton/pluralsight-docker-ci:latest manager Running Running 41 seconds ago
teg2amzw2f73 psight1.5 nigelpoulton/pluralsight-docker-ci:latest worker1 Running Running 40 seconds ago
Using pyenv for managing multiple python versions
Reference: https://realpython.com/intro-to-pyenv
Working on projects that require different python versions... pyenv can help manage the multiple python versions for each project by installing multiple python versions locally or even makes working with virtualenv easier (no need to activate and deactivate every time when we switch into and out of a project).
Install pyenv on ubuntu:
Add these lines to .bashrc or .zshrc
Now restart your current shell:
Using pyenv:
pyenv installs all python versions under ~/.pyenv.
$ pyenv install --list | grep " 3\.[678]"
The above command will install python version 3.8.2
➜ ~ pyenv versions
* system (set by /home/rwatsh/.pyenv/version)
3.8.2
➜ ~ pyenv which python
/usr/bin/python
As seen above, currently the system's python is active.
To change to the new python we installed:
➜ ~ pyenv global 3.8.2
➜ ~ pyenv which python
/home/rwatsh/.pyenv/versions/3.8.2/bin/python
➜ ~ pyenv versions
system
* 3.8.2 (set by /home/rwatsh/.pyenv/version)
➜ ~ python3 -V
Python 3.8.2
Since we added eval "$(pyenv virtualenv-init -)" to run in your shell virtualenv associated with the project directory will automatically be activated when we cd to that directory and deactivated when we move out of it.
We can also manually activate or deactivate as:
Thus, with pyenv we can:
Working on projects that require different python versions... pyenv can help manage the multiple python versions for each project by installing multiple python versions locally or even makes working with virtualenv easier (no need to activate and deactivate every time when we switch into and out of a project).
Install pyenv on ubuntu:
$ curl https://pyenv.run | bash
Add these lines to .bashrc or .zshrc
export PATH="$HOME/.pyenv/bin:$PATH"
eval "$(pyenv init -)"
eval "$(pyenv virtualenv-init -)"
Now restart your current shell:
$ exec $SHELL
Using pyenv:
pyenv installs all python versions under ~/.pyenv.
$ pyenv install --list | grep " 3\.[678]"
$ pyenv install -v 3.8.2
The above command will install python version 3.8.2
➜ ~ pyenv versions
* system (set by /home/rwatsh/.pyenv/version)
3.8.2
➜ ~ pyenv which python
/usr/bin/python
As seen above, currently the system's python is active.
To change to the new python we installed:
➜ ~ pyenv global 3.8.2
➜ ~ pyenv which python
/home/rwatsh/.pyenv/versions/3.8.2/bin/python
➜ ~ pyenv versions
system
* 3.8.2 (set by /home/rwatsh/.pyenv/version)
➜ ~ python3 -V
Python 3.8.2
The pyenv which python command shows that python 3.8.2 is installed under pyenv root directory ($HOME/.pyenv). Pyenv builds python from source and installs it under its root directory.
Creating virtualenv via pyenv:
➜ pyenv virtualenv 3.8.2 myproj
pyenv-virtualenv: `/home/rwatsh/.pyenv/versions/myproj' already exists.
Then in your project directory run:
➜ pyenv local myproj
(myproj) ➜ myproj
This will use the virtualenv under your local project directory. It creates a .python-version file to track the virtualenv being used in the project directory.
(myproj) ➜ cat .python-version
myproj
(myproj) ➜ pyenv which python
/home/rwatsh/.pyenv/versions/myproj/bin/python
Since we added eval "$(pyenv virtualenv-init -)" to run in your shell virtualenv associated with the project directory will automatically be activated when we cd to that directory and deactivated when we move out of it.
We can also manually activate or deactivate as:
$ pyenv activate
$ pyenv deactivate
Thus, with pyenv we can:
- Install multiple versions of Python
- Switch between the installed versions
- Use virtual environments with pyenv
- Activate different Python versions and virtual environments automatically
Sunday, April 19, 2020
Using Sublime Text 3

I like this cheat sheet (which by the way is the first one a google search for a cheat sheet for Sublime Text will return) - https://www.makeuseof.com/tag/sublime-text-keyboard-shortcuts-cheat-sheet/
Sunday, February 09, 2020
Ubuntu 19.10 on T490
I got a Lenovo thinkpad T490 in November 2019. It came with windows 10 home, 8GB built-in (soldered to board) RAM and 256 GB SSD with i5-8265u CPU (1.6GHz) quad core. Display size is 14" (1080p). Thinkpads are known for their excellent keyboard and i wanted to get a laptop with a good keyboard for mostly coding and personal learning (taking notes and practicing as a i learn something new). I got a macbook pro in 2015 and it still serves me well but it is a 15" macbook pro which is heavy to carry around. The T490 weighs about 3lbs and is pretty sleek.
I got a 1TB SSD and 16GB of RAM to upgrade the laptop. There is only one SSD slot so i had to replace the 256GB SSD with 1TB one. There is one external RAM slot and it had nothing on it so i added the 16GB RAM to it thus making total of 24GB RAM. Then i installed Ubuntu 19.10 (the latest as of that time) and instalation was a breeze. With the upgraded hardware, Ubuntu works very well.
I have since been using this as my main laptop at home. For taking any notes i find onlyoffice a great free alternative to MS Word. Other developer tools i use are terminator primarily for running kubectl, docker, vi, git etc. For IDE, i use intellij or pyCharm or VS Code. Terminator lets one split the terminal into multiple terminals all visible within the same window. This makes working on say a docker swarm cluster for example easy when we can be logged in each cluster node in the different terminals within the same window and be able to see each of them at the same time. This helps being more productive seeing all terminals side by side at the same time instead of having to switch between windows or tabs.
On the downside, battery life is not so great with Ubuntu and gives a 2-3 hrs of run time only (though i have read that battery life is much better with Windows 10 so it is more of an integration issue with Ubuntu). Also i have not setup fingerprint reader with Ubuntu but it did not work out of the box post install.
Update 04/17/20:
I updated to 20.04 Ubuntu (Focal) beta. The upgrade was pretty smooth from 19.10 to 20.04 LTS. It runs 5.4.0 Linux Kernel. I use Ubuntu with Gnome/Unity desktop environment. I am yet to explore all the new features in this release but so far have changed to Night Mode settings and this cuts down on the blue light effect of the screen during night time thus making it easier to use the laptop for long.
I seldom use my Macbook pro 2015 laptop and most of the learning (my main purpose behind getting a Linux laptop) is being met by T490 very well. Battery life remains to be an issue even with the newer release and i was hoping it will come close to the performance people claim they get when running Windows 10 on T490.
I got a 1TB SSD and 16GB of RAM to upgrade the laptop. There is only one SSD slot so i had to replace the 256GB SSD with 1TB one. There is one external RAM slot and it had nothing on it so i added the 16GB RAM to it thus making total of 24GB RAM. Then i installed Ubuntu 19.10 (the latest as of that time) and instalation was a breeze. With the upgraded hardware, Ubuntu works very well.
I have since been using this as my main laptop at home. For taking any notes i find onlyoffice a great free alternative to MS Word. Other developer tools i use are terminator primarily for running kubectl, docker, vi, git etc. For IDE, i use intellij or pyCharm or VS Code. Terminator lets one split the terminal into multiple terminals all visible within the same window. This makes working on say a docker swarm cluster for example easy when we can be logged in each cluster node in the different terminals within the same window and be able to see each of them at the same time. This helps being more productive seeing all terminals side by side at the same time instead of having to switch between windows or tabs.
On the downside, battery life is not so great with Ubuntu and gives a 2-3 hrs of run time only (though i have read that battery life is much better with Windows 10 so it is more of an integration issue with Ubuntu). Also i have not setup fingerprint reader with Ubuntu but it did not work out of the box post install.
Update 04/17/20:
I updated to 20.04 Ubuntu (Focal) beta. The upgrade was pretty smooth from 19.10 to 20.04 LTS. It runs 5.4.0 Linux Kernel. I use Ubuntu with Gnome/Unity desktop environment. I am yet to explore all the new features in this release but so far have changed to Night Mode settings and this cuts down on the blue light effect of the screen during night time thus making it easier to use the laptop for long.
I seldom use my Macbook pro 2015 laptop and most of the learning (my main purpose behind getting a Linux laptop) is being met by T490 very well. Battery life remains to be an issue even with the newer release and i was hoping it will come close to the performance people claim they get when running Windows 10 on T490.
Friday, January 17, 2020
FIRST Tech Challenge Season 2020

Rushil has been part of SkyRise Robotics FIRST Tech Challenge (FTC) team (# 16525) since last year. We started our journey in 2019 June. I was looking to have him join a team but could not find one nearby so with the co-operation of some like-minded parents in our community we formed a team of 8 kids comprising of 7th and 8th graders. The minimum grade to qualify for participating in FTC is 7th grade.
As a pleasant surprise we found that a veteran team (Iron Eagles from St Dominic Savio School) who had been participating in FTC for several years and were actively involved in the Austin Metro League management were available to mentor our team. The school was right next doors to our community so it was convenient for us to meet the mentor team.
One of the parents in our team had extensive experience with building robots.
Due to all these favorable factors our first year in FTC has been fantastic and a memorable experience.
At the time of this writing, we have participated in 3 of Austin Metro League meets where each team gets to play 5 games per meet. We are currently preparing for our League Championship meet on 2/1/20 at Vandergrift High.
Things we learned:
Hardware:
- Learned about different types of gears - spur, bevel, worm
- Rack and pinion
- Chain and Sprocket Drives
- Belt and Pulley
- Attaching arms to a motor
- Controlling picker/claw with Servo motors
- Motors
- Servo
- 12v DC motors
- Sensors - Gyro
- Cable management
- Different types of robot movement - Encoder based vs Time based.
- Block vs Java programming
- Operator controlled vs Autonomous mode
- Using Android Studio IDE
- Passing input from Logitech gamepad to Robot - Tank Drive vs Point-of-View Drive
- Setting up WiFi Direct connection between 2 Android phones
- Programming Mecanum Drive
- Using PTC VuForia to detect skystones.
CAD and 3D printing:
- CAD Modeling using Fusion 360
- 3D printing parts of the robot
Fundraising - conducted a class for kids in the neighborhood teaching Scratch programming for $5/kid. Had a good turnaround.
Community Outreach - conducted a session at a local library demonstrating our robot, letting kids in the library try to run it and in the meanwhile promoting FIRST mission to them and their parents.
Timeline of events:
- Started in June 2019 - formed a team of 4, registered team with FIRST
- By August 2019 - team size grew to 8
- Fundraising in August 2019
- By September 2019 - purchased the robot kit and started building a basic Chassis
- Attended SkyStone Season kick-off event at Vandergrift High
- October 2019 - Built the chassis with 2 powered wheels and 2 omni-directional wheels.
- Practiced for the first AML Meet in November
- Austin Metro League First Meet in November 2019
- Changed the Robot wheels to Mecanum wheels.
- Improved the Arm picker to work more reliably.
- AML 2nd Meet in December 2019
- Received grant from Dell via FIRST in Texas.
- Community outreach at Library in December 2019
- AML 3rd Meet in January 2019
Team SkyRise with their robot at AML meet #1.

A closer look at the robot kids built.
 Overall this has been a good endeavor and all the kids in the team learned several things about making the hardware, the software and working together as a team - cheering for each other and helping each other out.
A closer look at the robot kids built.
I think participating in a STEAM program like FTC or FLL (and there are several others) goes a long way to kindle the fire of learning by doing - in essence it is project based learning where kids actively participate in building a robot and in the process learn about engineering, doing math and thinking scientifically and using technology (for example 3D printing) creatively.
Wednesday, January 01, 2020
Installing single node kubernetes cluster using kind
Refer https://kind.sigs.k8s.io/
1. Install go
2. Install docker
3. Execute:
1. Install go
2. Install docker
3. Execute:
GO111MODULE="on" go get sigs.k8s.io/kind@v0.6.1 && kind create cluster
4. Run kubectl to get the cluster status.
```kubectl get ns```
```kubectl get ns```
Tuesday, December 24, 2019
Book Review: The Silent Patient by Alex Michaelides
 The Silent Patient by Alex Michaelides
My rating: 5 of 5 stars
A debut book by the author and a masterpiece of a work. Theo Faber is a psychotherapist and is trying to treat his patient Alicia Berenson who has gone silent after murdering her husband Gabriel. The story moves very slowly but the end is very nicely done. Highly recommended.
View all my reviews
Thursday, December 19, 2019
Shortcuts for kubectl for bashrc
alias k=kubectl
alias kp='kubectl get pods'
alias ks='kubectl get services'
alias kn='kubectl get ns'
function kexec() {
kubectl exec $1 -it -- /bin/sh
}
function kdelete() {
kubectl delete pod $1 --grace-period=0 --force
}
function krun() {
kubectl run $1 --image=$2 --restart=Never --dry-run -o yaml
}
function kapply() {
kubectl apply -f $1
}
alias kp='kubectl get pods'
alias ks='kubectl get services'
alias kn='kubectl get ns'
function kexec() {
kubectl exec $1 -it -- /bin/sh
}
function kdelete() {
kubectl delete pod $1 --grace-period=0 --force
}
function krun() {
kubectl run $1 --image=$2 --restart=Never --dry-run -o yaml
}
function kapply() {
kubectl apply -f $1
}
Wednesday, December 11, 2019
Installing minikube on Ubuntu
Following are the steps for setting up minikube on Ubuntu 19.10:
1. Install KVM
https://help.ubuntu.com/community/KVM/Installation
sudo apt-get install qemu-kvm libvirt-daemon-system libvirt-clients bridge-utils
2. Install minikube
https://kubernetes.io/docs/tasks/tools/install-minikube/
https://github.com/kubernetes/minikube/issues/2412
Set default VM driver as KVM.
minikube config set vm-driver kvm2
minikube delete
minikube start
$ minikube status
host: Running
kubelet: Running
apiserver: Running
kubeconfig: Configured
3. Install kubectl
https://kubernetes.io/docs/tasks/tools/install-kubectl/#install-kubectl-on-linux
$ kubectl get nodes
NAME STATUS ROLES AGE VERSION
minikube Ready master 59m v1.17.0
4. Install docker
sudo apt install docker
sudo apt install docker-compose
sudo groupadd docker
sudo usermod -aG docker $USER
docker run hello-world
1. Install KVM
https://help.ubuntu.com/community/KVM/Installation
sudo apt-get install qemu-kvm libvirt-daemon-system libvirt-clients bridge-utils
2. Install minikube
https://kubernetes.io/docs/tasks/tools/install-minikube/
https://github.com/kubernetes/minikube/issues/2412
Set default VM driver as KVM.
minikube config set vm-driver kvm2
minikube delete
minikube start
$ minikube status
host: Running
kubelet: Running
apiserver: Running
kubeconfig: Configured
https://kubernetes.io/docs/tasks/tools/install-kubectl/#install-kubectl-on-linux
$ kubectl get nodes
NAME STATUS ROLES AGE VERSION
minikube Ready master 59m v1.17.0
$ kubectl version
Client Version: version.Info{Major:"1", Minor:"17", GitVersion:"v1.17.0", GitCommit:"70132b0f130acc0bed193d9ba59dd186f0e634cf", GitTreeState:"clean", BuildDate:"2019-12-07T21:20:10Z", GoVersion:"go1.13.4", Compiler:"gc", Platform:"linux/amd64"}
Server Version: version.Info{Major:"1", Minor:"17", GitVersion:"v1.17.0", GitCommit:"70132b0f130acc0bed193d9ba59dd186f0e634cf", GitTreeState:"clean", BuildDate:"2019-12-07T21:12:17Z", GoVersion:"go1.13.4", Compiler:"gc", Platform:"linux/amd64"}
4. Install docker
sudo apt install docker
sudo apt install docker-compose
sudo groupadd docker
sudo usermod -aG docker $USER
docker run hello-world
Thursday, September 05, 2019
Book Review: What I Talk About When I Talk About Running by Haruki Murakami, Philip Gabriel (Translator)
 What I Talk About When I Talk About Running by Haruki Murakami
My rating: 5 of 5 stars
A memoir on how running became an important part of author's life. This is a short book where author recounts how he started running one fine day out of the blue when he used to be a chain smoker and decided to change his life by running every day. He stuck to the habit and ran almost 6 days a week, an hour a day, almost covering 6 miles on an average every day, thus running 36 miles a week and running almost 1900 miles a year. At the time of writing this book author has been a runner for 2 decades. There are several books on running - some are about laying out plans for beginners that they can follow like a 20 week plan for preparing for your first marathon, there are others in the same vein about cooking recipes suitable for a runner, and then some about experiences of professional runners. Most of those books have been written by authors who are not novel writers or professional story tellers. This book stands out as being written by an author who is a professional writer who has written several novels of great acclaim and who also happens to be a mature runner with enough experience under his belt to be able to tell others what worked for him or to just recount about his experiences as a runner. It is a short book and written in a way that will engage the reader. I am a beginner in running and this book was a pleasure to listen to so much so that i will be listening to it couple more times. Author's routine of running 6 days in a week may not be good for a beginner as it may tire their knees and make them more susceptible to injury and that is where i plan to go back to the books that cater to beginners and use the information on how to train from there instead. But this book serves well as a good motivator for anyone interested in running - be it a beginner or an experienced runner.
View all my reviews
Subscribe to:
Posts (Atom)
-
I hit this issue recently which occurred on only one windows 7 host. The error was caused by this hard to guess reason ( http://support.mic...
-
 At times, you may have wanted to perform some action periodically in your web application. Quartz is an enterprise grade scheduler which can...